This has been a project! I have been planning our bedroom for awhile, as I never wanted to actually change our current room around, I decided to collect all of the stuff I wanted for the next space and then slowly start on those projects. Well that time is coming, so the projects begin!
Over the summer we became garage sale addicts, what is better than a garage sale? An Estate Sale! I can't wait for summer Estate Sales again! We searched and searched for a set of night stands, and we finally got lucky and found these.
They look good, but not what I wanted, I knew I wanted to play with this clean canvas!
We decided to take advantage of having a deck and nice weather, we also had to learn some spray painting techniques. Oh there were so many mistakes we made, I think we tried to rush it and just plan ole be lazy! First we didn't clean the piece, and instead of sanding we decided to prime. Both mistakes, oh and the biggest one? We forgot to get masks, so after the first night of painting we both went to bed with killer headaches and tasted spray paint. Not a good idea!
After two coats of priming we decided to paint the stands white, as I knew my dresser would be a vibrant color and I wanted the accents to stand out more then the night stands.
The white looked good, but since we used flat (I wanted a older style then glossy), it needed a little umph to make it pop. I figured why not try out a lace technique I found on Pinterest?
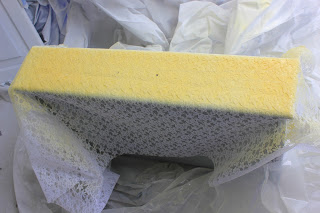
Easier then I thought, just place lace on top (I didn't use the spray adhesive this time, but will next time, just makes the lace stay flat)
Nice even coat, and leave for 30 minutes to dry.
Peel off and Viola (sp?) you have pretty lace detail!
I did this on my drawer and the center of the two doors.
I knew I wanted new handles, the originals were ugly! We found some at Hobby Lobby that I loved, but didn't want to spend over $5 a piece!!! That would be $30+ for new handles, I think I can save that. I found 6 handles at walmart that I could spruce up for 1/3 that cost!
One really awesome hint that I found was to put nails facing up in cardboard to spray them with out having to touch them. The color selection in spray isn't exactly what I desired, so I settled on this blue, but I'm still in search for a different color. Good thing it is really easy to change the color up!
We found new hinges, but they were $3 a piece, and I would need 8! No thanks, threw a bit of white paint that I had left over and boom done! :)
Don't mind the mess.. but here it is against the other one I still need to do.
I like the white, we decided to do it a little thin so you could still see the grain and gray primer underneath. I like the yellow lace, but not crazy about the shade of blue handles.
I wish I could say that this project is done, but unfornetly I still have one more to paint!


No comments:
Post a Comment